Product Availability Status Monitoring
Uptime Kuma software offers the capability to monitor webpages or online stores for specific phrases. Product Availability Status Monitoring feature enables you to track product availability in selected stores and receive notifications whenever the product’s status changes.
Step 1: Logging in to Uptime Kuma
Step 2: Out-of-Stock Product Labeling
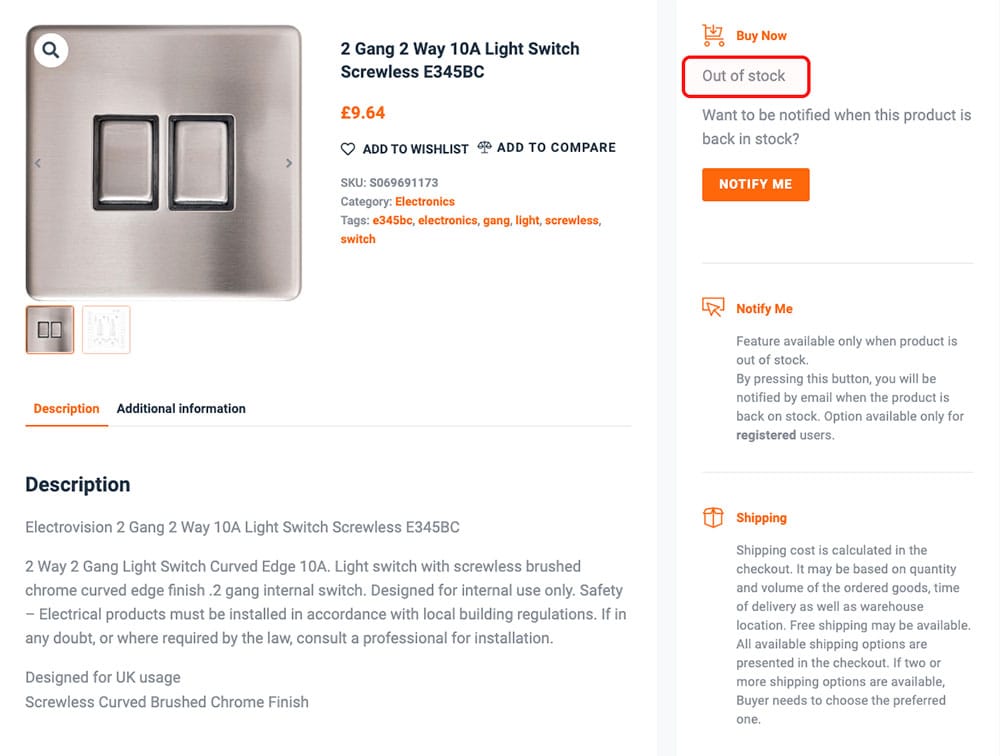
Check how your selected store displays product availability information and what exact phrasing it uses for unavailable products, such as “Out of stock”. This phrase will be used to monitor the product page.
In the example below, an unavailable product is labeled with the term “Out of stock”.
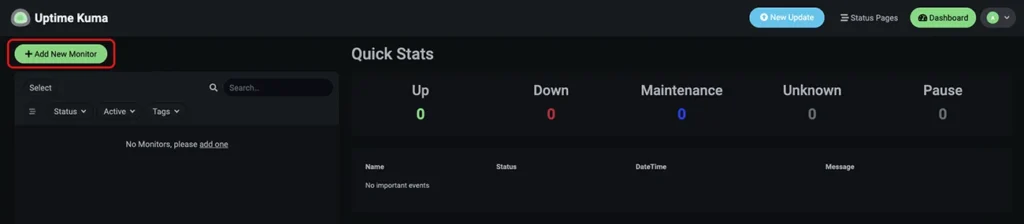
Step 3: Setting Up a New Monitor
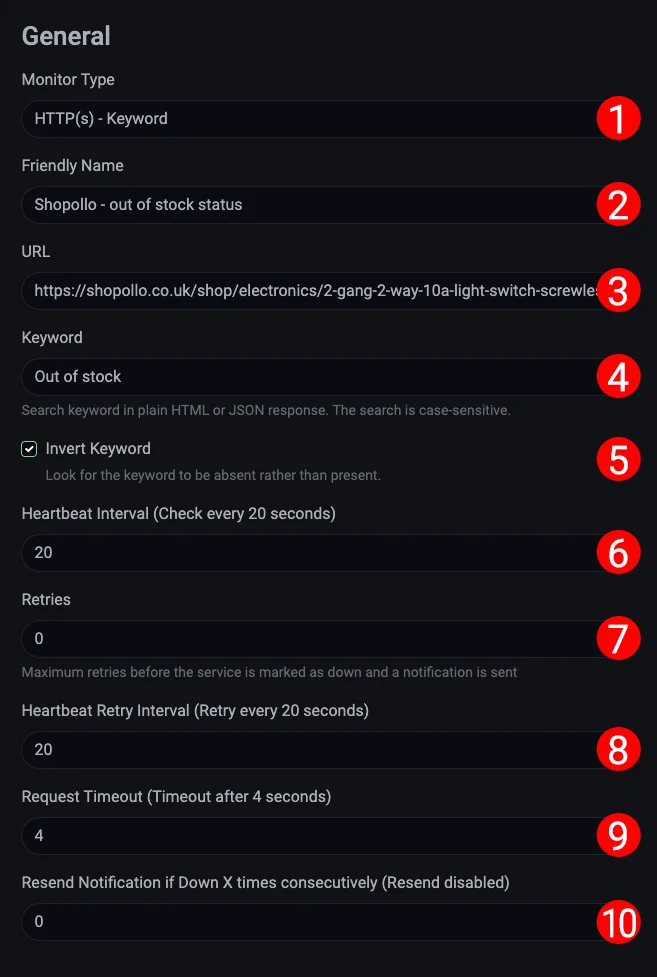
- 1 – General
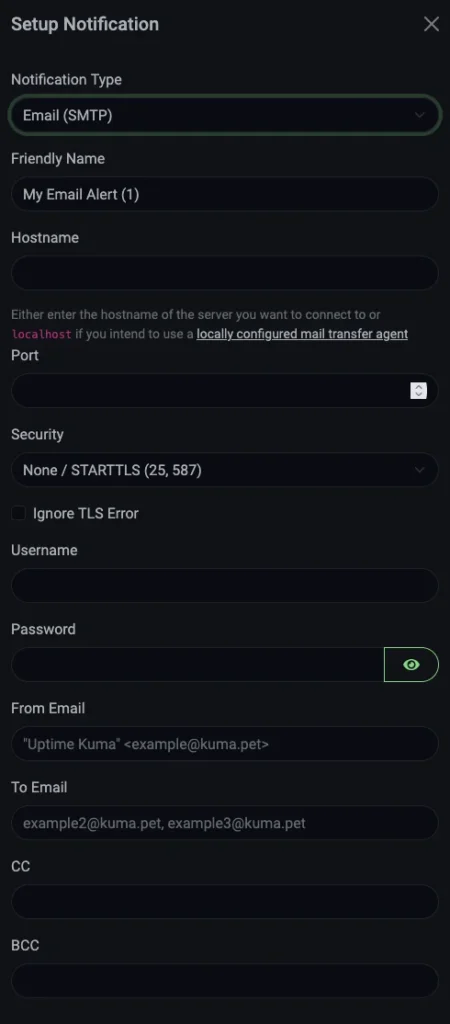
- 2 – Notifications

General section
- 1 – Monitor type – choose the service type to monitor. To monitor product availability, select HTTP(s) – Keyword as your service type.
- 2 – Friendly Name – give your monitor a clear name (e.g., “Product X Stock Check”) – this will help you recognize it later in Uptime Kuma..
- 3 – URL – enter the URL of the product page you want to monitor. You can copy it from your browser’s address bar when viewing the product.
- 4 – Keyword – enter the phrase that indicates product unavailability in your store. In our example, this is “Out of stock”.
- 5 – Invert Keyword – by default, Uptime Kuma considers the service (in this case, our product) as available when the specified keyword appears on the page. To make product unavailability trigger a “service down” status in Uptime Kuma, reverse the monitoring logic by checking this box.
- 6 – Heartbeat Interval – set how often product page should be checked by entering the number of seconds between monitoring attempts. This interval determines both how quickly product status changes are detected and the timeframe used for calculating statistics.
- 7 – Retries – we recommend setting this value to 0 to ensure notifications are sent for every product status change.
- 8 – Heartbeat Retry Interval – for product monitoring, we recommend setting this value to match your “Heartbeat Interval” setting.
- 9 – Request Timeout – server response timeout – the time after which the store is considered unavailable and product status verification becomes impossible. We recommend keeping the default value..
- 10 – Resend Notification if Down – set the number of retries before sending another notification. For product availability monitoring, set this value to 0.
Notifications section
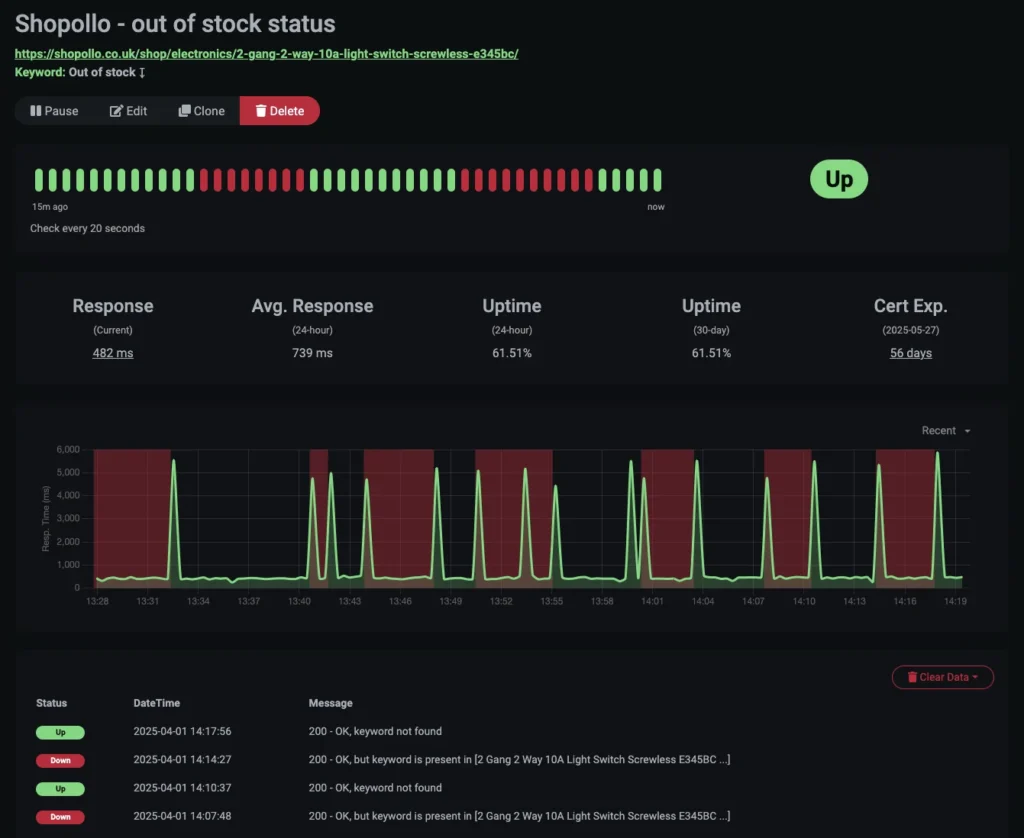
Step 4: Product Availability Status Monitoring - Statistics and Settings
When your product availability monitoring is properly configured, statistics will begin appearing on the chart. Every product status change in the store will be visible both on the graph and in the event log below it. Periods when the product was unavailable will be marked in red on the chart.
This dashboard provides full monitor management capabilities including configuration modifications, temporary suspension, duplication for similar products, or complete removal.